How to Install Tile Over Tile in a Shower

This finished tile floor is installed over a plywood and cement backer board subfloor.
Installing tile over a wood subfloor is a lot easier today than it was when I started my remodeling career.
The old-fashioned mud method of floating a thick mortar bed in preparation for the tile has given way to using cement backer board over a plywood subfloor.
Cement board is inexpensive ($10 or less for a 1/2″ thick, 3′ x 5′ sheet), easy to install, and sufficient for most installations. Among the trade names you'll see are Durock, made by U.S. Gypsum Corp., and PermaBase, from National Gypsum Co.
Manufacturers provide clear installation instructions with cement backer board, but there are a few other important points you need to know to guarantee a long-lasting installation.
For example, I always like to remove the old flooring material so I can check the subfloor for any water damage. Years of water seeping along the edge of a bathtub or shower can cause areas of rot that need to be repaired.
If everything is in good shape, you can then cut the cement backer board (always wear an approved respirator or mask when dry-cutting cement based products).
Next, use a notched trowel to apply thin-set adhesive to the plywood, set the backer board in it while it's still wet, and drive corrosion-resistant screws made for countersinking into the backer board through the plywood. Do this at intervals recommended in the backer board instructions (usually every 8 inches) to ensure a firm foundation for the tile.
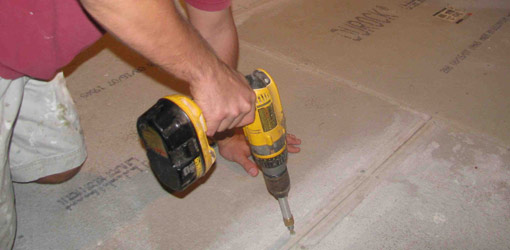
Use a cordless drill to screw cement backer board to a plywood subfloor.
Set the heads of all screws and any existing nails slightly beneath the wood surface, then use a lightweight gypsum leveling compound to fill and level voids or low spots. If you take this kind of care with the prep work, the finished tile won't crack over time.
Finally, lay out the location for the tile, apply a coat of thin-set to the backer board, and lay the tile. Once the tile has set, apply grout to the joints between the tile, wiping off any excess with a damp sponge.
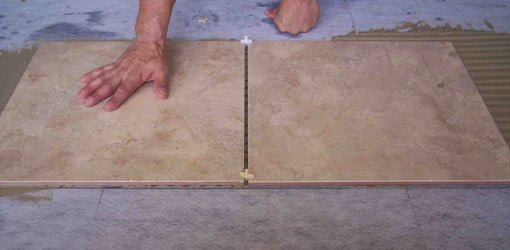
Setting tile on cement backer board with spacers used to align the tile.
The proper fasteners, mortar, tile adhesive and joint tape are all specified by the manufacturer, but don't use drywall screws since they can corrode.
Another mistake I often see is grout wedged between the last row of tiles and the tub, cabinets or doorsill. Grout in these transitional areas will crack as the floor expands and contracts. These areas should get a bead of acrylic or silicone caulk instead so the joint remains flexible.
I'm often asked by homeowners if it's possible to lay down new tile over an existing tile floor. This is not my favorite way to install tile, but it can be done, as long as the existing tile and subfloor are in good condition, and the old tile is thoroughly cleaned and scuffed up with sandpaper to allow the new mortar to grip.
The combination of newly applied mortar and tile will raise the level of the floor by at least 3/8″. Trimming the bottom of the bathroom door and building up the doorsill usually hide the fact there are two layers of tile instead of one.
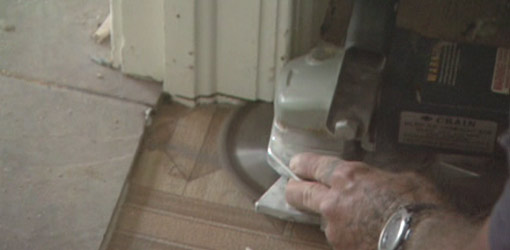
Trimming the bottom of a door casing with a jamb saw so the tile will fit under it.
The subfloor under the tile should be at least 1 1/8″ thick, with a minimum of 5/8″ thick exterior grade plywood topped by 1/2″ cement backer board.
Further Information
- How to Tile Over Hardwood Flooring (article)
- Tiling Over a Tile Floor (article)
- How to Tile Over Existing Vinyl Floors (article)
- How to Level a Subfloor (video)
- How to Lay a Tile Floor (article)
- How to Tile a Bathroom Floor (video)
- How to Tile a Floor Using an Underlayment Membrane (video)
- How to Lay Tile Over an Existing Vinyl Floor (video/article)
How to Install Tile Over Tile in a Shower
Source: https://todayshomeowner.com/installing-tile-over-a-wood-subfloor/